Even though bowling has existed in one form or another for thousands of years, today’s modern version of the game didn’t evolve until over 100 years ago. That’s when bowling became standardized, with official rules being drafted and exact specifications being prescribed for bowling balls, pins and lanes.
Although bowling has been around for many years, it remains popular among American recreational enthusiasts in all age groups, including children and young adults. Across the United States, the number of bowling participants ages 6 and older surpassed 45 million in 2017.
While the game of bowling hasn’t changed much during the past century, bowling balls have. The earliest versions of today’s bowling balls were made from wood and often didn’t have gripping holes, which meant players had to palm their balls to play. Beginning in the early 1900s and continuing through the next five decades or so, bowling balls were typically made of hard rubber. In the late 1950s and early 1960s, rubber balls started to be replaced with bowling balls consisting of polyester.
Since the 1980s, bowling balls have undergone significant changes on the inside and the outside. On the outside, polyurethane coverstocks took hold in the ’80s, followed by reactive resin coverstocks in the early 1990s and particle coverstocks later in the same decade. These advances in coverstocks enabled bowling balls to generate significantly more friction with a bowling lane’s surface. As a result, the new bowling balls gave players the ability to get more hook on the lane and an improved entry angle into the pins compared to their predecessors.
In addition to making changes to the exterior of their balls, bowling ball manufacturers also made alterations to the inside of their balls during this time period. Using advanced cores, also known as weight blocks, manufacturers produced bowling balls with dynamically imbalanced cores. These new cores contributed to the increased amount of hook bowlers could produce in the lane.
Bowling Ball Components

In general, modern bowling balls are often classified as three-piece or two-piece balls. In past decades, a given ball’s classification referred to the literal number of pieces that were used to construct the ball, but that’s not necessarily the case today when it comes to two-piece balls. Three-piece balls still typically consist of three components — a thin coverstock, filler material and a pancake weight block.
The two-piece balls that are produced today, however, often have more than two components due to the addition of weight blocks in an outer core that is separate from a ball’s coverstock. This means a two-piece ball normally has three pieces — a coverstock, core and outer core.
Regardless of whether you have a three-piece or two-piece bowling ball, your ball’s coverstock will influence the way your ball performs on-lane more than any other component used to construct your ball. In fact, 60%-80% of your ball’s on-lane performance will be determined by its coverstock. By contrast, only 20%-40% of your ball’s performance will be attributable to your ball’s core, drilling layout and other physical properties.
Sanded vs. Polished Coverstocks
With your ball’s coverstock influencing your play so heavily, it’s important to understand how the condition of your ball’s coverstock impacts your ball’s performance in the lane. Generally speaking, bowling balls are manufactured with a coverstock that is either sanded or polished. Put simply, your bowling ball will produce more friction with the lane if it has a rough or sanded surface.
If you want your ball to hook earlier toward the end of a lane’s oil pattern, you’ll probably prefer a sanded coverstock over a polished one. Conversely, if you want your ball to travel further down the lane before it starts to hook, a ball with a polished surface is the right choice for you.
Regardless of whether your ball has a sanded or polished surface, you can treat your ball’s coverstock to better match your personal playing style as well as the condition of the lane you’ll be playing on. Your ball’s coverstock has certain characteristics you must keep in mind when you’re preparing to modify your ball’s surface because making changes will impact the amount of friction your ball will generate on-lane.
These characteristics include the following:
- Roughness: The roughness of your ball’s coverstock is determined by the distance between the peaks and valleys on its surface, the height and depth of those highs and lows and the chemical makeup of the coverstock and its finish. As was previously discussed, a rougher surface area generally produces increased friction on the lane.
- Rate of absorption: Today’s reactive resin coverstocks are permeable, which means they absorb liquids, including lane oil. Balls with a higher rate of absorption generate an increased amount of friction in play.
- Surface hardness: While surface hardness isn’t as relevant today as it was in previous decades, the hardness of your ball’s coverstock can still affect your ball’s overall performance in-lane. As a general rule, the softer a ball’s surface is, the less friction the ball will create with the lane.
If you’re going to compete in an event sanctioned by the United States Bowling Congress (USBC), your ball’s coverstock must meet the following requirements:
- Average peak-to-valley surface roughness: The average peak-to-valley surface roughness of a ball’s coverstock is often referred to as “Ra.” To compete in a USBC bowling match, the coverstock on your ball must have an Ra that is less than 50 micro-inches at a surface finish of 500 Abralon.
- Dry lane coefficient of friction: Also known as “COF,” your ball’s dry lane coefficient of friction must be less than .32 for balls weighing more than 13 pounds when tested by the USBC under certain conditions.
- Hardness: Your ball’s hardness must have a measure of 72 or more when it’s assessed with a type D Shore durometer in order for you to participate in a USBC bowling contest. Its Mohs hardness must be 6.0 or lower.
Maintaining Your Bowling Ball 
While you can’t change the hardness of your bowling ball, you can maintain your ball for optimum performance. Basic maintenance includes wiping your ball before every shot you take. Wiping your ball often will help it to roll consistently, and it will also prevent the ball’s coverstock from absorbing oil. When you finish a playing session, you should wipe down your bowling ball with an appropriate commercial cleaner as well.
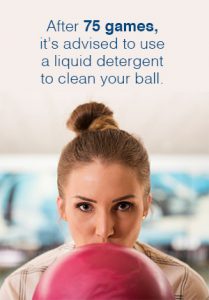
After every 75 games or so, it’s generally advisable to use a liquid detergent to thoroughly clean your ball. Of course, it’s also wise to clean your bowling towel, too. It’s debatable how often you should surface or resurface your bowling ball for peak performance. Some sources say you should resurface after 60 games, while others suggest you can play more than four times that number of matches before you’ll need to resurface your ball.
Many factors influence how often and when you’ll need to resurface your ball, including your ball’s track area. When the track area begins to show signs of wear and tear, you should normally consider resurfacing your ball.
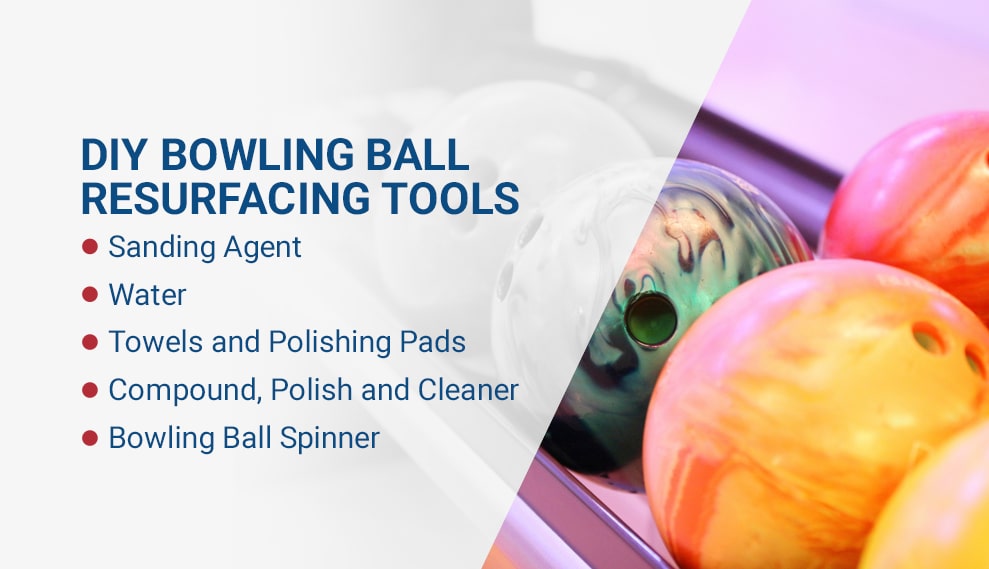
DIY Bowling Ball Resurfacing Tools
With single-speed and multi-speed ball spinners becoming more and more affordable, many bowlers are embracing DIY bowling ball resurfacing techniques. Regardless of whether you plan to resurface a bowling ball without a spinner or with one, you’ll need some basic tools to get the job done correctly.
The things you’ll need to resurface your bowling ball include the following items:
1. Sanding Agent
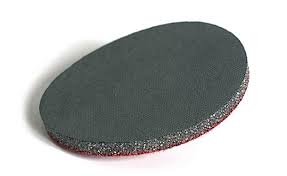
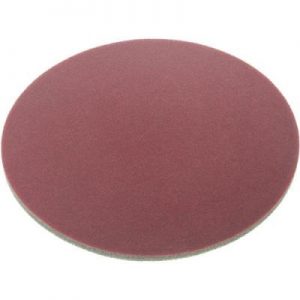
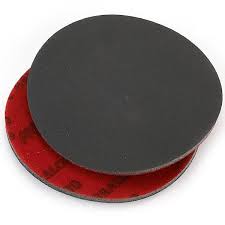
You have your choice when it comes to what you’re going to use to actually sand your bowling ball. While some people use sandpaper or 3M Scotchbrite pads to surface their balls, theMirka AbralonandSIA air sanding padsand discs we have for sale at National Abrasives, Inc. are also popular choices.
Depending on what your resurfacing goals are, you may need different levels of grit, meaning you might need more than one sanding agent. SIA air discs come in grits that range from 240G up to 4,000G. Abralon pads are availablein the following grits:
- 180G
- 360G
- 500G
- 1,000G
- 2,000G
- 3,000G
- 4,000G
2. Water
You’ll need a bowl of water that is big enough for you to rinse your sanding pads in. You’ll also need a spray bottle filled with water on hand so you can spritz your bowling ball as needed. Using water during the resurfacing process provides two benefits. First, it keeps your ball and hands lubricated and cool despite the friction involved with sanding. It also helps to prevent the dust you’ll create as you sand your ball from spreading unnecessarily.
3. Towels and Polishing Pads
If you’re going to apply a compound or polish to your bowling ball after you’re done resurfacing it, you’ll need to have several towels or polishing pads as well. You should use a different towel or pad for every product you apply to your ball. Use one towel to apply a compound, a second one to apply a polish and a third one to clean your ball, for example.
4. Compound, Polish and Cleaner
Make sure the compound, polish and cleaning productsyou’ll need are readily available for use after you’ve finished sanding your ball.
5. Bowling Ball Spinner
If you don’t have access to a bowling ball spinner, you can resurface your bowling ball by hand using a home resurfacing kit.
| Shop Sanders Online | Shop Handpads Online | Shop All Bowling Surface Maintenace |
How to Resurface a Bowling Ball With a Spinner
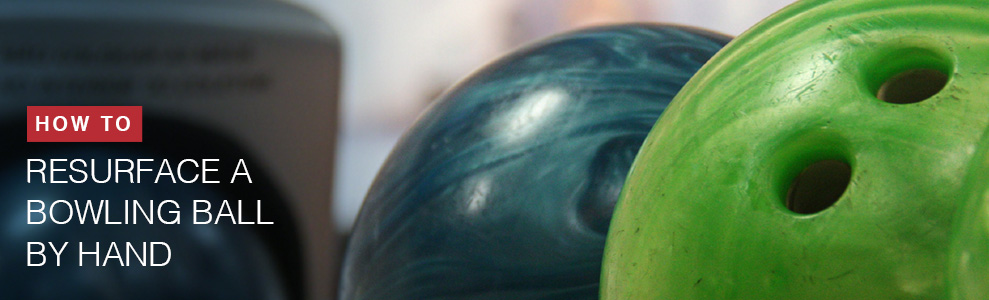
A bowling ball can generally be resurfaced any number of times up until the name of its manufacturer begins to disappear from its surface. Whether you’re trying to figure out how to resurface a bowling ball at home for the first time or you’ve already mastered the process after resurfacing your ball multiple times, the process is basically the same.
Higher vs. Lower Grits
The first step to resurfacing your bowling ball is to decide what results you want to get from the resurfacing process. Your end goals will determine the grit you use as well as the sanding technique you’ll employ.
In general, lower grits will help your ball handle heavily oiled lanes better and are suitable for players who have a lot of ball speed coupled with a low number of revolutions because they’ll leave your ball with more surface. Higher grits leave less surface on your ball and are appropriate for players who want more control because higher grits will make your ball’s hook phase longer during play.
Sanding Techniques
Depending on the sanding technique you use, you can create an earlier or later hook, an increased or decreased hook and a change in length. The most common sanding technique is to cross sand at a 90-degree angle from your ball’s initial sanding pattern. If you sand with your ball’s original track instead, your ball will provide greater length coupled with more aggression at the rear of the lane. To get an early roll paired with a less aggressive backend, you’ll want to sand against your ball’s initial track.
Unless you’re hoping to achieve a specific goal by using a particular sanding technique, it’s typically a good idea to position your bowling ball in your spinner with the center of its grip at the top when you’re ready to start sanding. When you’re done sanding the exposed surface, you’ll rotate your ball 180-degrees. When you’re done working on that surface, you’ll rotate your ball 90-degrees.
Finally, you’ll turn the ball another 180-degrees and continue sanding to ensure you’ve sanded all of your ball’s coverstock. Another way to look at the rotation pattern you should follow is this:
- Label
- Opposite label
- Top and then bottom of label side
- Right and then left sides of the label
How to Use Abralon Pads
Here are some tips for using Abralon pads on a bowling ball once your ball is in your spinner:
- Wet pads and ball: To keep your hands protected from the heat the friction between your sanding pad and ball will create and to keep the spread of dust to a minimum, spritz your ball with some water and douse your Abralon pad in water as well. Using water throughout the time you spend sanding will also rinse away the loose particles generated by sanding, which will make your sanding more consistent overall.
- Set spinner speed: If your spinner has two speeds, set your spinner on the lowest speed when you’re sanding. If you’re applying a compound or a polish, your spinner should be set to the highest speed. If your spinner only has one speed, you can still apply a compound or polish with it.
- Palm Abralon pad: It is critical that you hold the Abralon pad you’re working with properly. Use the palm of your hand only to hold the pad on your bowling ball. Using your fingers to move the pad up and down the side of your bowling ball as you sand puts you at risk for a serious injury if one of your fingers gets stuck in one of your ball’s holes.
- Apply pressure: You’ll need to apply pressure to your Abralon pad to achieve the resurfacing results you want. As a general rule, you should apply more pressure for shorter periods of time when you’re using pads with lower grit. When you’re sanding with pads that have higher levels of grit, you should apply less pressure for greater lengths of time.
- Time sanding: While you’ll normally want to keep sanding until you can no longer see the lines that were running in the opposite direction from the one you’re working in, it’s critical to sand each area of your bowling ball evenly. You can make sure you do this by keeping a mental count of the time you spend working on your ball in each of the positions mentioned above.
- Change grit: Depending on your resurfacing goals, you may have to change pads to work with another level of grit. Make sure you’ve sanded the entire surface of your bowling ball with the grit you’re currently using prior to moving to a higher or lower grit level.
There is debate about whether you should use higher grits in sequence or if it’s okay to skip a level or two before you use the highest grit level you intended to finish with. However, it’s widely recommended that you avoid using a grit that is more than 1.5 times as smooth as the one you just finished using.
For instance, you should use the Abralon pad with 2,000 grit after you use a 1,000G pad and before you use a 4,000G pad instead of moving directly from the 1,000G pad to the 4,000G pad.
If you’re sanding to a lower grit, you can start with the lowest grit you plan to use, but make sure you use a new pad. Employing used pads is only appropriate when you’re sanding to a lower grit in a sequence of steps, and a used pad will be used in an intermediate step rather than the final one.
The Final Steps in Resurfacing
After you finish sanding, take these final steps to complete your resurfacing:
- Apply compound: Once you’re done sanding, it’s time to apply compound if you want to do so. Applying compound will ensure your bowling ball has full contact with the lane during play. Set your spinner to high speed and use a cloth to apply an even amount of product on your ball as you continue to rotate it in the manner prescribed earlier.
- Apply polish: After you’ve applied the compound, use a separate cloth to apply polish. While compound will give your bowling ball a shiny appearance, polish will give it a tacky finish. Polish will also normally help your ball to have a sharp reaction on the backend when you bowl.
- Clean your ball: The final part of resurfacing a bowling ball is to clean it. You don’t need to use your spinner to clean your bowling ball. Simply spray some cleaner on it and wipe your ball with an unused cloth. Remember to clean your ball’s finger holes as well as its exterior.
Bowling Ball Resurfacing FAQs
If you’re resurfacing your ball for the first time on your own, you may have some additional questions. Consider these frequently asked questions before getting started.
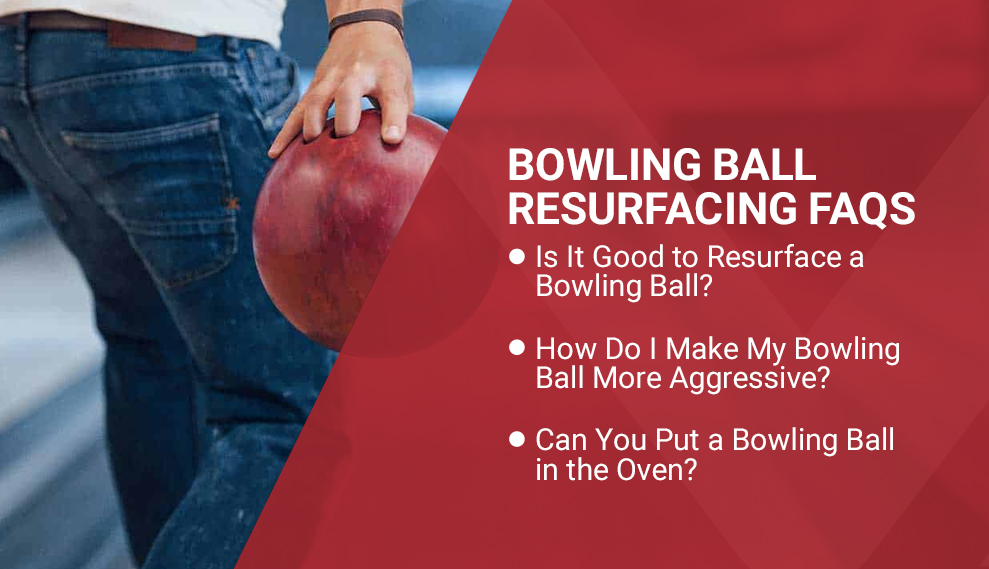
Is It Good to Resurface a Bowling Ball?
Bowling balls have pores that help the ball grip the oiled lane. Because of these pores, there is more friction between the ball and the lane. With stronger friction, the bowler can achieve a more effective hook. It’s good to resurface your bowling ball to deep clean these pores, as they can get clogged with oils over many uses. Resurfacing also sharpens the edges of the pores, giving the ball a better grip.
How Do I Make My Bowling Ball More Aggressive?
Smoother ball surfaces tend to slide around on an oily lane more than dull balls will. Because of this, resurfacing your ball using a low-grit pad will add the necessary texture to your ball to give it a more aggressive grip on oily lanes. For example, if you’re bowling on lanes that are heavily concentrated with oil, you may consider using a 500 grit Abralon pad to add more texture to your bowling ball.
Can You Put a Bowling Ball in the Oven?
As a home remedy for cleaning oily bowling balls, many bowlers have tried baking their bowling balls to draw the oils out of the ball’s pores. This method is ineffective and can be risky. With hot temperatures, you risk burning yourself or damaging your ball. It’s best to properly take care of your bowling ball, which can still be done at home with supplies from National Abrasives, Inc.
Brands We Trust


Get the Supplies You Need at National Abrasives, Inc.
Family-owned and operated, National Abrasives, Inc. offers competitive pricing, free product samples and even free shipping with minimum purchases. Our SIA air discs with an aluminum oxide abrasive are perfect for wet or dry sanding projects, including resurfacing your bowling ball. Known for their exceptionally long product life, low scratch depth and permeability, you can use our 6-inch waterproof SIA air discs over and over again to resurface your bowling ball.
Our variety of Mirka Abralon sanding discs includes Mirka Abralon Foam Grip Discs in the following sizes:
- 3 inches
- 6 inches
- 9 inches
- 12 inches
Whether you’re going to use these products to resurface a bowling ball without a spinner or you’re going to use a spinner for resurfacing purposes, these products will give you an even finish every time you use them. If you buy a certain amount of Mirka Abralon pads, you’ll qualify for a bulk discount and free shipping.
At National Abrasives, Inc., our customers’ satisfaction is always our top priority. Lance Thomas of IPG in York, Pennsylvania, recently had this to say about our company:
“We have been purchasing supplies from National Abrasives for the last 12 years. Their ability to stock unusual items allows us to react fast to our customers’ demanding needs and deadlines. We also rely heavily on National to deliver — whether it’s 5 belts or 500, they always come through.”
Just as we’ve delivered for IPG for years, we’re ready to deliver for you, too. We have the resurfacing supplies you need to get the maximum performance from your bowling ball. Whether your next tournament is just days away or you’re not planning on playing for a few weeks, we’ll make sure you have the products you need when you need them.
If you’re getting ready to resurface your bowling ball by hand, contact National Abrasives, Inc. today. Our friendly, helpful customer service representatives can help ensure you have the sanding supplies you need to get your ball to perform the way you want it to. From sanding belts to abrasive discs and sanding sheets, we’ll help you find what you need for your project. Browse our abrasives and sanding discs for bowling to see what we have to offer.
Learn More about Bowling Ball Abrasives
- Bowling Ball Surface Maintenance Guide
- Abrasive Products for Bowling
- Sanders and Buffs for Bowling Balls
*Updated on November 08, 2021.